Streamline your team’s management by connecting Microsoft Entra ID (formerly Azure AD) to Smarter Drafter Pro. Using the SCIM (System for Cross-domain Identity Management) protocol, you can automatically provision users, manage group memberships, and ensure your user list stays synchronised in real-time.
Generate your Smarter Drafter API Credentials
Before heading to the Entra portal, you need to grab your unique endpoint and generate a secure token.
1. In Smarter Drafter Pro, navigate to Users & Permissions > Provisioning in the left-hand sidebar.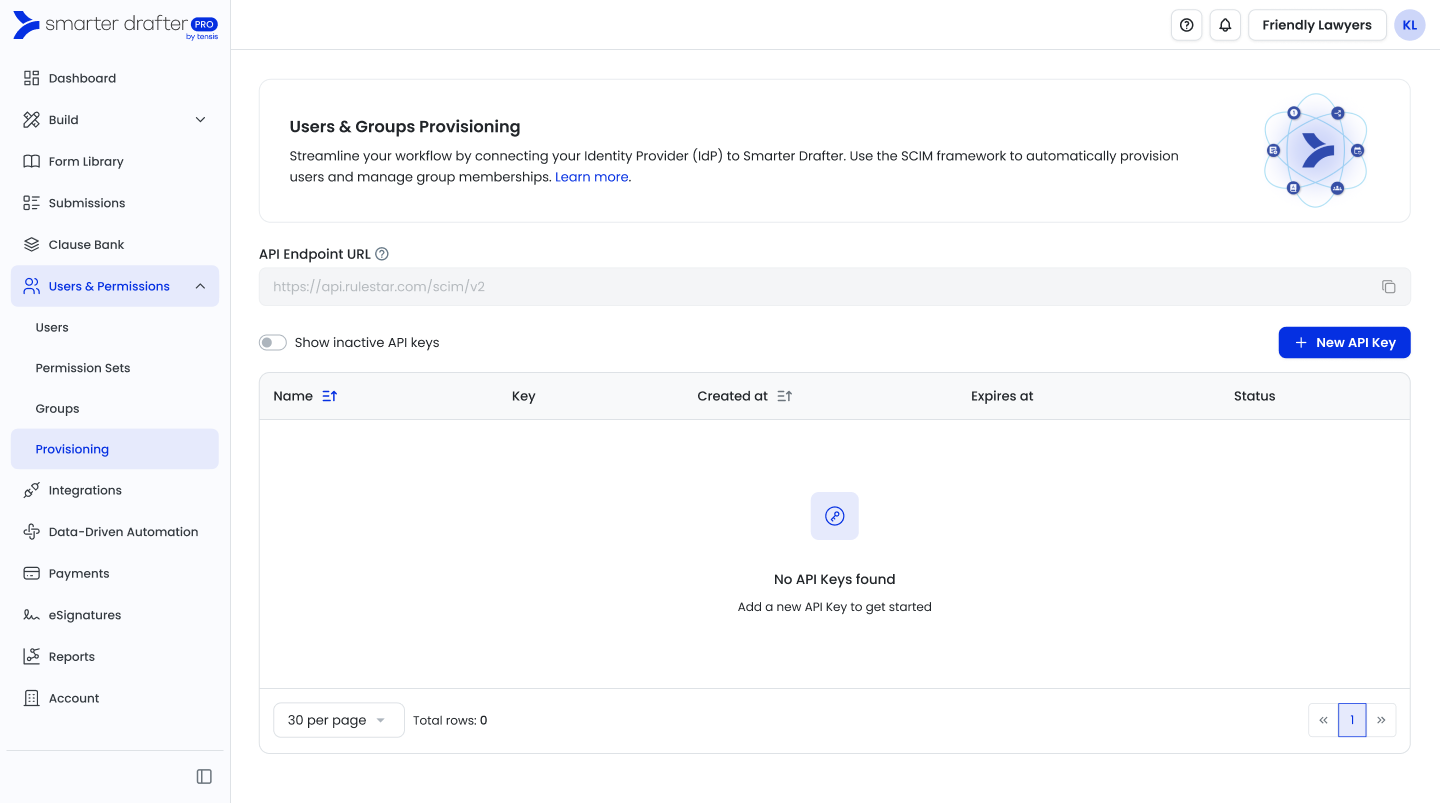
2. Copy the API Endpoint URL: This will look like https://server/scim/v2.
3. Click New API Key, then in the slide-out menu:

-
- Name: Give it a descriptive name (e.g., "Entra Sync").
- Expiration: Select your preferred duration.
4. Click Save
Important: A modal will appear with your API Key. Copy this immediately and store it securely; it will not be shown again.
Configure Microsoft Entra ID
Now, set up the connection within your Microsoft environment.
1. Sign in to the Microsoft Entra admin center.
2. Go to Entra ID > Enterprise apps.
3. Select + New application, then click + Create your own application.
4. Enter a name (e.g., "Smarter Drafter Pro Provisioning") and select "Integrate any other application you don't find in the gallery (Non-gallery)".
5. Click Create.1. In your new application, select Provisioning from the left sidebar and click Get started.
2. Change the Provisioning Mode to Automatic.
3. Expand the Admin Credentials section:-
- Authentication Method: Bearer Authentication
- Tenant URL: Paste the API Endpoint URL you copied from Smarter Drafter.
- Secret Token: Paste the API Key you generated.
4. Click Test Connection. Once you see a success checkmark, click Save.
1. In the Provisioning screen, expand Mappings.
2. Click Provision Microsoft Entra ID Users. Review the attribute mappings and match the required user attributes. Remove any that are not necessary. You might want to use SCIM Validator to facilitate the mapping before sending real data or use /scim/v2/Schemas to see the valid properties.
The following lists the Smarter Drafter fields that can be mapped in Entra.
| Smarter Drafter User Attribute | Required? | Description |
|---|---|---|
| userName | Yes | Email address of the user, this relates to Direct email field in Smarter Drafter |
| active | Yes | Determines if the user is active or inactive - inactive users will not be able to login to Smarter Drafter |
| title | Yes | Prefers to Position in Smarter Drafter user profile |
| name.givenName | Yes | First name in Smarter Drafter |
| name.familyName | Yes | Surname in Smarter Drafter |
| externalId | Yes | Unique identifier for the user |
| serviceEmail | No | |
| initials | Yes | |
| office | No | Office of the user in Smarter Drafter. Must match exact name in Smarter Drafter (case insensitive). |
| directPhoneNumber | Yes |
Example mapping - please note that Entra attributes may differ based on your tenant setup in Entra.

3. Return to Mappings and click Provision Microsoft Entra ID Groups if you wish to sync group memberships.
4. Scope: Under Settings, decide if you want to sync "All users and groups" or "Only assigned users and groups." We recommend "Only assigned" for better control.
Activation
1. Set the Provisioning Status toggle to On.
2. Click Save.
3. Navigate to Users and groups in the Entra sidebar to assign the specific people or teams you want to sync to Smarter Drafter.
Note: Initial synchronisation typically takes 20–40 minutes to complete. You can monitor progress back in Smarter Drafter under the Provisioning tab, where you'll see the "Last synced" timestamp and the count of users/groups managed by SCIM.